Importance
Videos with polished visuals convey your message in a professional way while helping to maintain your audience’s attention.
Target Audience
- Videographers and photographers
- Social media professionals
How-To
Find Locations and Practical Light
- Whenever possible, find a location that has light switches you can operate, or speak with building maintenance personnel to see if they’re willing to help. Turn off the room’s lights and use natural window light or supplement with your own lights, as the lights installed in buildings are often flat, overhead and sometimes even inconsistent colors. Using lights balanced to “daylight” or 5600 Kelvin will match window light from outdoors and are the usually the optimal choice – although if there are room lights you cannot turn off, matching their color temperature (to your estimation) with an adjustable-temperature light will help keep things consistent.

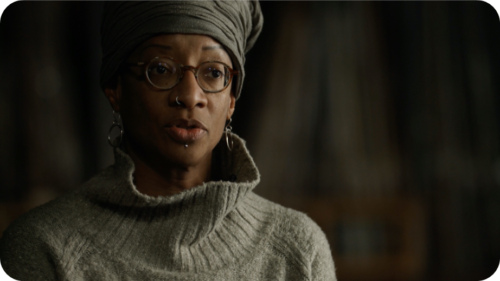
- Harsh overhead lighting is generally not the most flattering for the subject, so whenever possible, use spaces with large windows out-of-frame and no direct sunlight to give the subject more diffused, “softer” lighting. This provides an appealing ratio of light to dark across their face, no harsh shadows cast by their nose, etc.
- Ideal locations will be larger rooms with a decent amount of depth – keeping your subject physically far removed from the background to keep it out of focus will generally deliver a more appealing image and guide the viewer’s eye. Try to keep bright windows out of the background or close the blinds, if available.
- When outdoors, it is always recommended to either use shade for soft lighting, or to use the sun as a backlight, while bouncing some return light into the subject’s face. Both of these choices will create an aesthetically pleasing look, compared to having the subject’s face be hit directly by harsh sun light.
Use Lighting Equipment
- The larger and closer to the subject a light source is, the softer it will be. Generally, soft lighting provides a more professional, polished look. If your lighting equipment only has a small source, consider bouncing the light off the ceiling or a nearby wall in order to maximize its size and light your subject from one side. If your subject is sitting on the right, facing left across the camera’s field of view, light them from the broad side, past the left side of the frame.
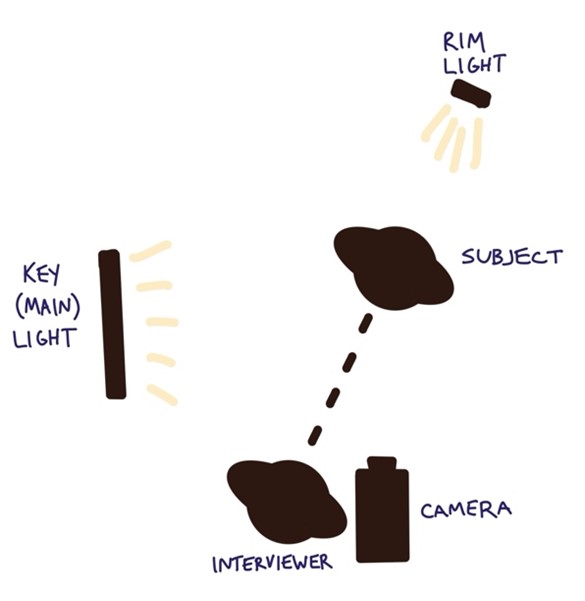
- In order to make your subject “pop” off the background, consider placing a small light behind them. This is a “rim light” – when placed properly (and not too bright!) it can give the subject a gentle halo and separate them from the backdrop.
Discover Rule of Thirds, Symmetry and Other Compositional Tips
- A common choice for positioning your subject, especially in a video with a “documentary” or “interview” feel, is to place your subject’s face a third of the way into the frame on either side. Place the interviewer on the opposite side of the camera so that the subject’s gaze crosses the image.
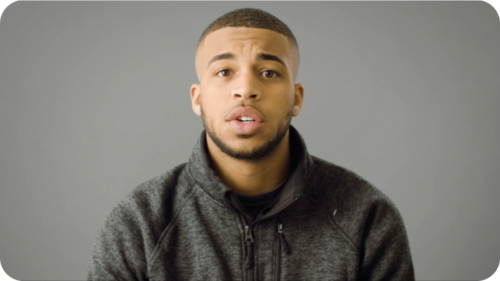
- If you are having your subject memorize their lines or using a teleprompter, symmetrical framing is a common choice. Lighting should still provide a soft ratio of light to dark from one side to the other.
- If you have time, consider rearranging objects and furniture in the background of your image for aesthetics – but make sure you have permission and that you put things back when you’re done!
Additional Resources
The diagram below showcases a simple lighting setup.
Contact
Video Services, Strategic Communications and Marketing, videoservices@illinois.edu